Top Tips for Smoother Self Leveling Grout Finishes

Time:2026-10-17 Author:Ethan
0%

A smooth self-leveling grout finish begins before the material leaves the mixing bucket. The substrate must be clean, stable, and free from dust, oil, paint, and loose particles. Small defects can become visible across a wide, glossy surface. Moisture also matters. Excess water may improve flow briefly, yet it can weaken the cured layer and create pinholes.

Dr. Karen L. Scrivener, a respected cement-materials scientist, offers a useful principle: “Good performance comes from controlling the variables, not chasing the symptoms.” That idea applies directly to self-leveling grouts and mortars. Consistent water measurement, slow mechanical mixing, and correct working temperatures produce more predictable results. Follow the product data sheet carefully. Even experienced installers can misjudge flow when the room is unusually cold or humid.

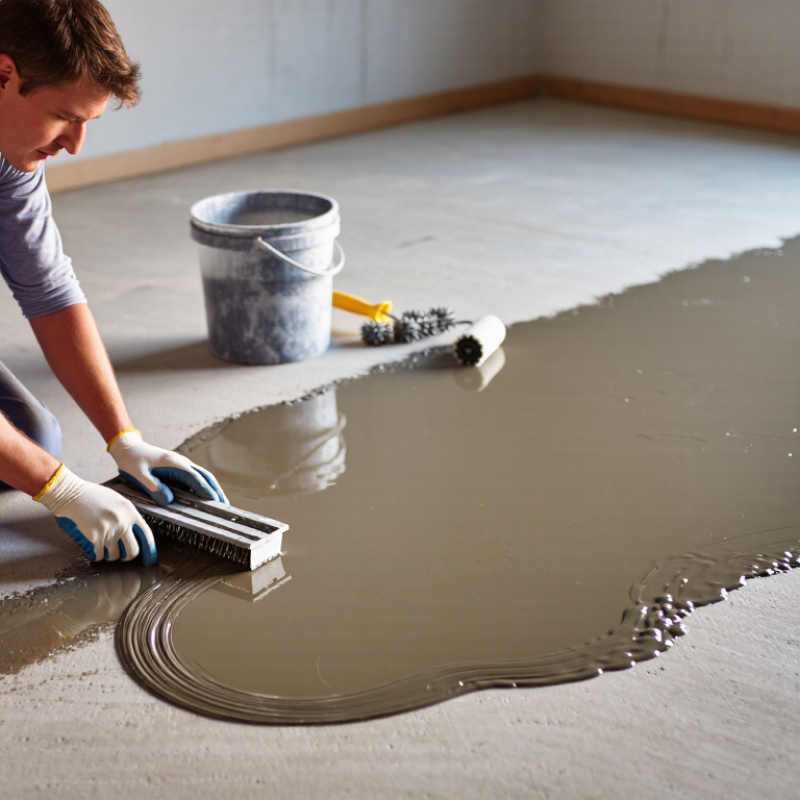
The finishing process needs calm timing. Pour in a steady ribbon, then guide the material with a gauge rake or smoothing tool. Avoid aggressive overworking. It can trap air and leave marks that appear after curing. A spiked roller may help release bubbles, but only within the manufacturer’s stated working window. Corners deserve attention. They often hold dry powder or collect excess material.

The goal is to Improve the smoothness and finish of self-leveling grouts and mortars through disciplined preparation, not hurried correction. Perfection is not guaranteed. I have seen a promising pour lose its uniformity because one bucket received slightly more water. That small mistake deserves review. Better finishes come from measuring, observing, and adjusting one controllable detail at a time.
Top Tips for Smoother Self Leveling Grout Finishes

Choosing the Right Self-Leveling Grout for a Smooth Finish

Choosing the right self-leveling grout starts with the surface, not the color.
A clean, stable substrate helps the grout spread evenly and cure without weak spots. On site, I check the required thickness, moisture conditions, and working time before opening the bag. A high-flow formula suits broad, shallow areas, while a thicker grade may perform better around drains or uneven edges. Read the technical data sheet carefully. Fast-setting grout can save time, but it leaves less room for correction. That matters.

I once chose a quick-curing product for a warm room and underestimated its short working window. The mix began stiffening before I finished spreading it. The surface looked acceptable, but minor ridges appeared under side lighting. That mistake taught me to compare pot life with room temperature, crew size, and mixing speed. I now test a small area first. It reveals flow, color consistency, and edge behavior.

Look for clear guidance on water ratios, maximum thickness, curing time, and compatible substrates.
Excess water may improve flow briefly, yet it can reduce strength and encourage shrinkage. Use a measured container, a clean mixer, and consistent mixing intervals. Keep the floor protected from drafts and direct heat during curing. For heavy traffic areas, confirm the expected load and select a grout rated for that service. A smooth finish depends on product fit and disciplined preparation, not fluidity alone.

Preparing the Surface and Mixing Area Before Application

Top Tips for Smoother Self Leveling Grout Finishes

Preparing the surface and mixing area carefully improves every self-leveling grout finish. Remove dust, paint flakes, grease, and loose particles from the substrate. A vacuum works better than sweeping alone. Check the floor for cracks, weak spots, and moisture before opening the material. Repair unstable areas and let them cure fully. I once ignored a small damp patch, and the surface later developed uneven bonding. That mistake was avoidable.

Keep the room within the recommended temperature range, and close windows that create strong drafts. Mark doorways and protect nearby walls before mixing begins. Set out a clean bucket, measured water, mixer, gauge rake, and spiked roller. Everything should be within reach. Do not guess the water amount. Excess water may cause separation, weak edges, or longer curing. Too little water can leave ridges and dry lumps. Mix at a steady speed until the compound looks uniform, then allow the stated resting time when required. Mix only what can be placed during its working time. Work in sections, but avoid long pauses between batches. A second person can measure water and clean tools, though this arrangement still needs practice. Even experienced installers should inspect the surface again before pouring. Small preparation errors become highly visible under finished flooring.

Top Tips for Smoother Self-Leveling Grout Finishes

Typical preparation and mixing checkpoints before application, measured in minutes.

Allow enough time to inspect and vacuum the substrate, repair visible defects, apply primer, and prepare the mixing area before combining the material. Keep the mixing process efficient because self-leveling grout usually has a limited working time. Actual timing may vary according to product instructions, temperature, humidity, and substrate condition.

Mixing and Pouring the Grout with Proper Timing

Top Tips for Smoother Self Leveling Grout Finishes

Mixing and pouring grout at the right moment controls flow, bonding, and surface smoothness. Check the product’s working time before opening the first bag. Measure water precisely; extra water may improve flow briefly, but it can weaken the cured layer and increase shrinkage. Use clean, cool water and a low-speed mixer to reduce air entrapment. Mix until the powder disappears, then allow the stated induction time. Do not guess.

Timing matters more than many installers expect. Prepare tools, buckets, and the work area before mixing begins. Pour each batch while the previous batch remains workable. Keep a wet edge, and spread the material with a gauge rake before lightly using a spike roller. ASTM F2170 moisture testing can identify excessive slab moisture before installation. This matters because trapped moisture may cause blistering or debonding. A 2023 KPMG Global Construction Survey reported that only 31% of construction projects met budget expectations within a 10% range, showing how small process failures can create costly rework.

Tips: Record room temperature, water quantity, mixing time, and batch sequence. Maintain consistent conditions across the floor. Avoid stopping beside doorways or cold joints. Follow the manufacturer’s stated pot life, not the appearance of the mix. I have seen smooth pours fail after rushed preparation. The surface looked acceptable at first. Later, weak edges revealed the mistake. Leave enough labor for continuous placement, because leveling compound rarely waits for a delayed second person.

Spreading, Leveling, and Removing Surface Imperfections

Smooth self-leveling grout begins with controlled spreading, not speed. Divide the floor into manageable bays, then pour at the manufacturer’s stated thickness. Use a gauge rake to distribute material evenly, keeping the teeth in contact with the substrate. A spiked roller can release trapped air, but excessive passes may leave waves or pull material from corners.

Moisture control matters. ASTM F2170 requires three in-situ relative-humidity tests within the first 1,000 square feet, plus one test for each additional 1,000 square feet. Record readings before mixing. Dust, weak concrete, and unfilled cracks can telegraph through the finished surface. I prefer cleaning edges by hand because a vacuum often misses powder along wall lines.

Surface imperfections need early attention. A flat scraper can remove ridges after curing, while a diamond pad can soften small high spots without gouging the surface. Do not chase every minor mark immediately. Some defects become clearer after lighting changes. I still inspect floors from several angles, especially beside windows. That step feels slow. It prevents careless repairs. A 1.5-meter straightedge helps reveal rocking, gaps, and isolated humps that casual walking will miss. Allow proper curing time before sanding or installing the final surface.

Curing and Protecting the Finished Grout Surface

Top Tips for Smoother Self Leveling Grout Finishes

Curing and Protecting the Finished Grout Surface

A smooth grout finish still needs controlled curing after placement. Protect the surface from direct sun, drafts, heaters, and early foot traffic. These conditions can pull moisture from the top layer too quickly. Shrinkage cracks may then appear before the lower material has hardened.

ACI 308R-16 identifies curing as an immediate post-finishing operation. It also notes that seven days is commonly used for many cement-based systems. I would not treat seven days as universal. Temperature, mix water, thickness, and ventilation can change the required protection period. ASTM C511 uses 23 ± 2°C and at least 95% relative humidity for laboratory curing conditions. Field conditions are rarely so forgiving.

Cover the grout with clean, non-staining protection when the surface can resist marking. Keep the cover flat, but avoid dragging it across the finish. Do not allow water to pond on the surface. Condensation can create pale patches and uneven texture. ASTM C109/C109M compares mortar strength at 3, 7, and 28 days, showing why early hardness is not final performance. A careful installer should record room temperature, humidity, placement time, and inspection results. My checklist is useful, but it is not perfect. Unexpected airflow still deserves a second look. Once protected, keep tools, dust, and construction debris away until the specified curing period ends.

FAQS

What should I check before choosing self-leveling grout?

Inspect the substrate, required thickness, moisture, and available working time. The surface must be clean and stable.

Which grout consistency suits different areas?

A high-flow formula suits broad, shallow areas. A thicker grade may work better near drains or uneven edges.

Why should I test a small area first?

A small test reveals flow, color consistency, and edge behavior. It may also expose problems before the full installation.

How does temperature affect working time?

Warm rooms can make grout stiffen faster. Compare pot life with room temperature, crew size, and mixing speed.

What happens if too much water is added?

Extra water may improve flow briefly. It can also reduce strength and encourage shrinkage.

How can I create a smoother finish?

Use measured water, a clean mixer, and consistent mixing intervals. Spread carefully before the material begins stiffening.

How should fresh grout be protected during curing?

Block direct sun, drafts, heaters, foot traffic, dust, and debris. Use clean, non-staining protection without dragging it across the surface.

Is seven days always enough curing time?

Not always. Temperature, moisture, thickness, and ventilation can change the required protection period.

What records should installers keep?

Record room temperature, humidity, placement time, and inspection results. My checklist helps, but it can miss unexpected airflow.

When is the grout ready for heavier traffic?

Follow the specified curing period and confirm the expected load. Early hardness does not prove final performance.

Conclusion

Achieving a smooth self-leveling grout finish begins with selecting the right product for the project, considering factors such as thickness, setting time, strength, and compatibility with the substrate. Before application, clean and repair the surface, remove dust and debris, seal gaps, and organize the mixing area and tools. Accurate water measurement and thorough mixing are essential for a consistent flow without lumps or excessive air. Plan the pouring process carefully so each batch is placed within its workable time and can blend smoothly with the previous one.

After pouring, spread the grout evenly with suitable tools and gently release trapped air while avoiding overworking the surface. Address edges, low spots, and minor imperfections before the material begins to set. To Improve the smoothness and finish of self‑leveling grouts and mortars, protect the area from foot traffic, drafts, moisture changes, and contamination during curing. Following the recommended curing period helps the finished surface develop better uniformity, durability, and appearance.

Ethan

Ethan

Ethan is a seasoned marketing professional with a deep expertise in our company's innovative product line. With a passion for sharing knowledge and insights, he takes the lead in regularly updating our corporate blog, where he explores industry trends, product features, and effective marketing......